Installing FastenFlex laces

How to install FastenFlex elasticated laces
Installation is quick and easy but just in case, here is our step by step guide to installing FastenFlex laces.
Before you start
You'll need a pair of trainers, a pair of scissors and your pack of FastenFlex laces to get started. If you don't have your laces yet, order some today!
What's in the pack?
- 2 x 100cm elasticated laces
- 2 x spring loaded lace locks
- 2 x lace end clips
Here's a really quick "how-to" in 15 seconds but if you still want step by step, keep reading x

Remove existing laces from the trainers you want to install FastenFlex laces in.
Now you're good to get started!
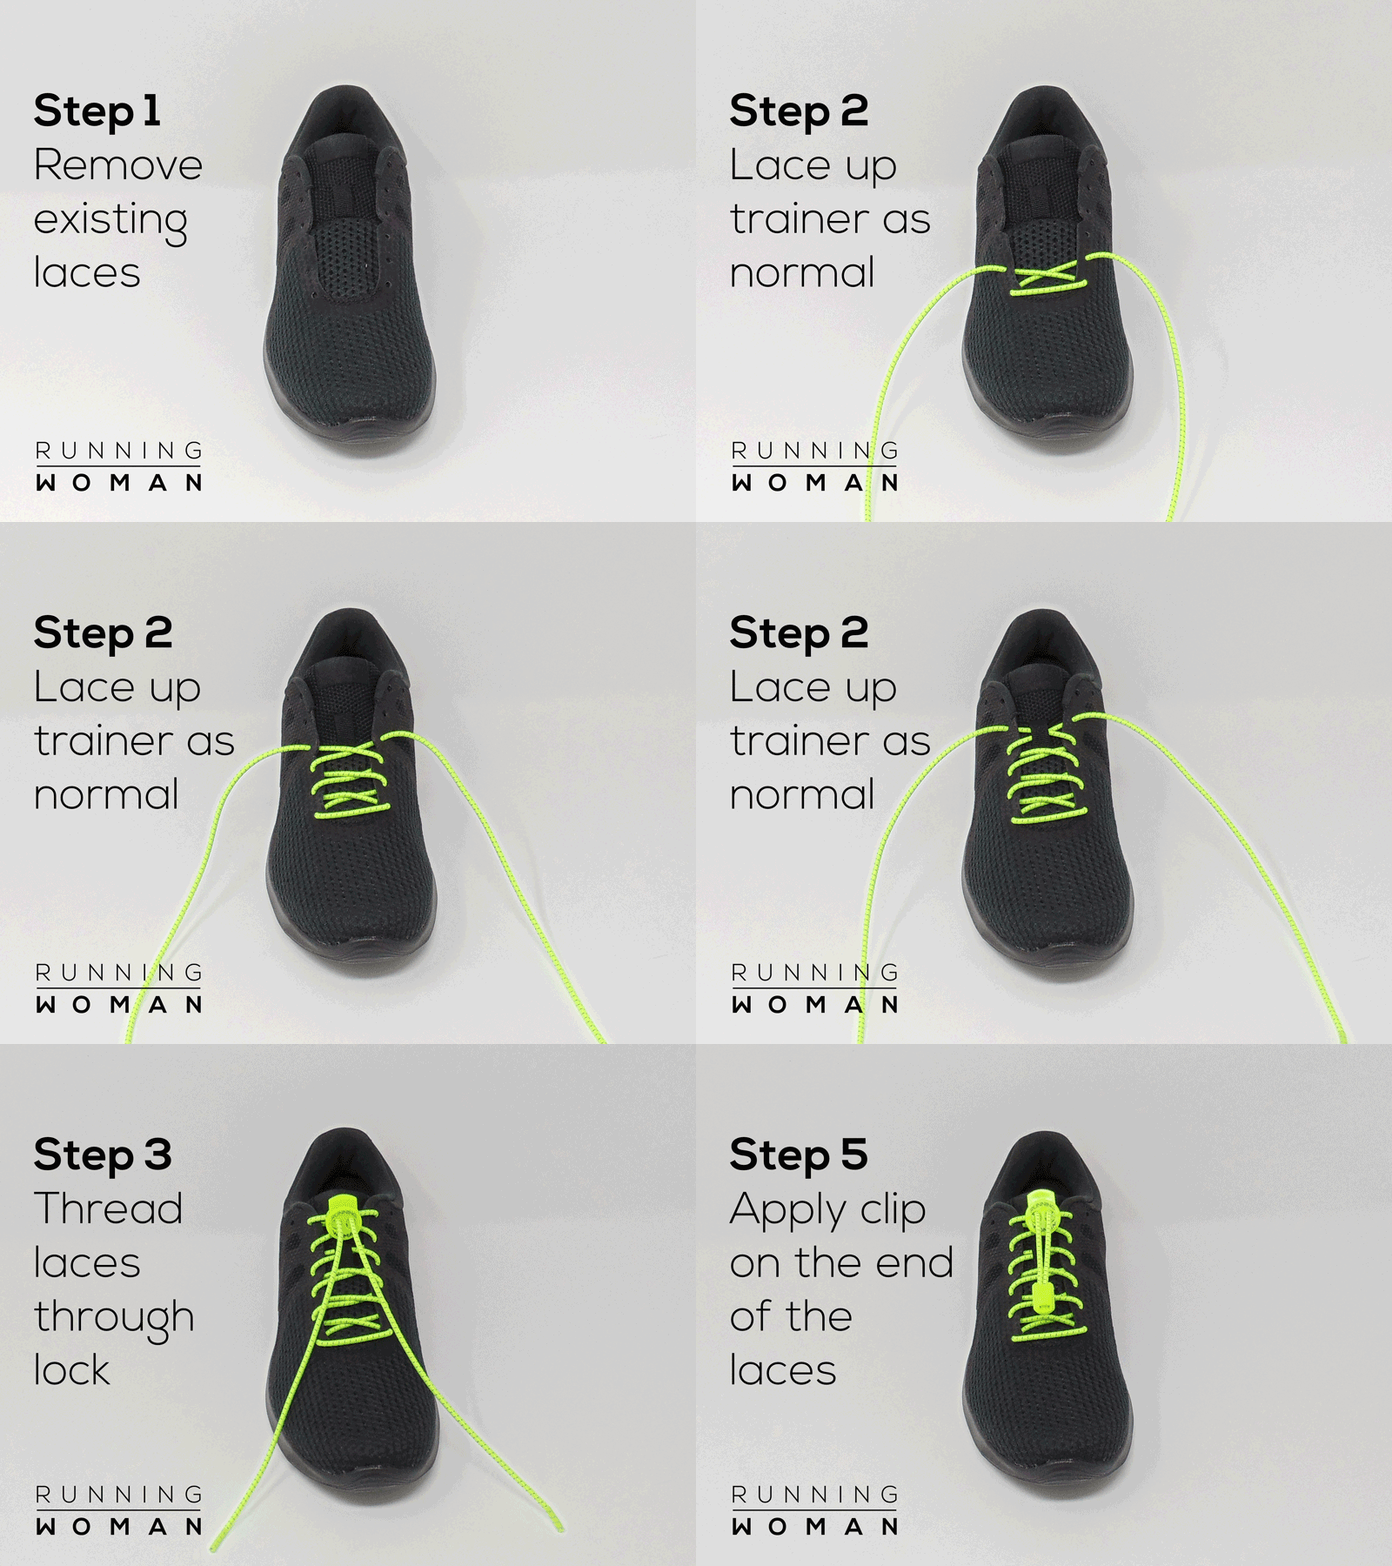
1. Remove existing laces and lace up with your FastenFlex lace
This is where you can get rid of your boring, dull or just dirty laces and replace with these beautiful FastenFlex laces.

2. Thread laces through lace lock
These lace locks are the best out there, separate holes and a really firm spring is going to mean you need a really good pinch to get the laces through the holes in one go. Be sure not to try and drag the lace through when the lock is engaged, the lock will hold really firm and likely spoil your beautiful new laces.

3. Trim the excess laces down
We recommend you leave at least 5cm of laces left for adjustment. It helps to have a nice clean cut as you're going to be clipping the ends of the laces together with your clip.

4. Simply clip the laces together and you're good to go
Once you're clipped down, you're on your way to comfort and beauty. If you need to adjust the clip at any time, a pair of tweezers (or similar) pushed gently into the gap at the end will release the clip for you to adjust and go again.


